
I hope you enjoy using this tutorial. If you are unfamiliar with needle felting, please visit the needle felting primer I have written. As with all forms of craft, there are many ways to accomplish the same task, this tutorial is written the way I needle felt. When making flowers, I like to refer to a gardening book for petal shape, color design and placement.

Supplies:
-Romney wool roving in your chosen colors. I used purple (although it looks blue online), gold, black and white. Any wool that needle felts well can be used, but Romney works well for me so that’s what I buy.
-Felting needles triangle sizes 36, 38 and 40; star size 38
-Foam pad
-Pin back if you choose to turn it into a pin
Step 1:
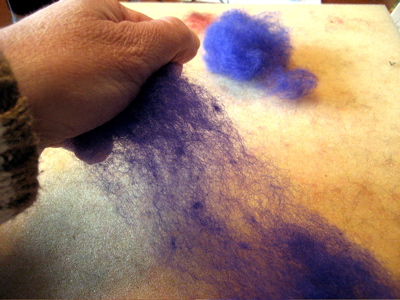
Begin by separating some fibers to use as a petal.
Step 2:
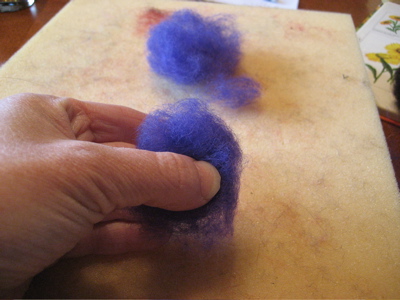
Shape the fibers into a basic pedal shape. Remember everything will shrink as it is felted, so your piece should start out larger than the final petal.
Step 3:
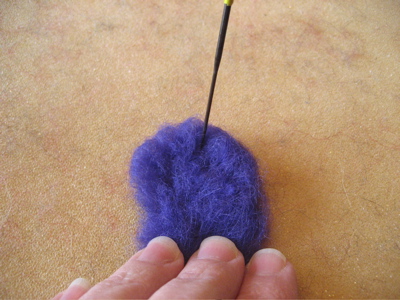
Begin felting with a size 38 triangle needle. Start in from the edge about 1/4″. Move around the piece as you needle up and down. You want to evenly felt the piece, if you spend too much time in the same spot it will become more tightly felted than the rest. Don’t forget to flip the piece over and felt from the other side.
Do not felt the bottom of the petal that will attach to the other petals. It will attach easier and more securely to the others if not previously heavily felted at the connection points.
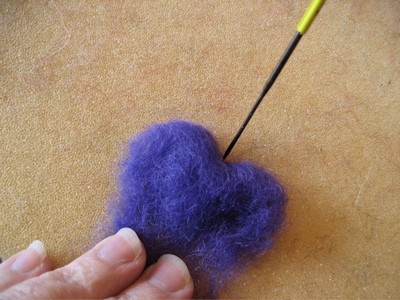
Step 4:
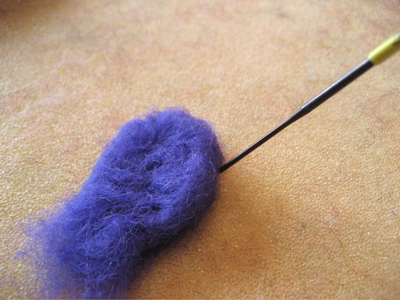
Begin to work on the edges. It can be very useful to angle the needle to encourage a nice edge. Remember, no matter what angle the needle goes in, it needs to come back out the same or you risk damage to the needle.
Flip piece and work on the edges from the other side.
Step 5:
At this point you want the piece to still feel somewhat spongy but nicely shaped. By not completely felting the piece at this point, it will be easier to add details and they will incorporate into the piece nicer.
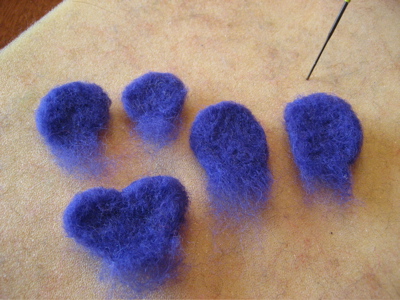
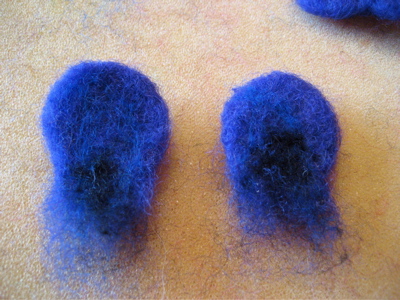
Repeat all of the above till you have 5 petals. You will need two back petals, two slightly smaller side petals, and one front petal that is much wider than the others.
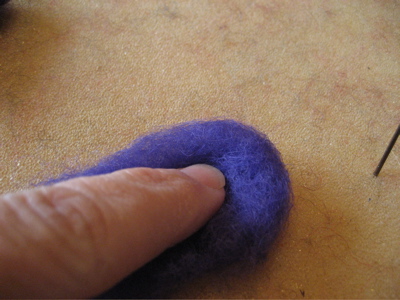
Step 6:
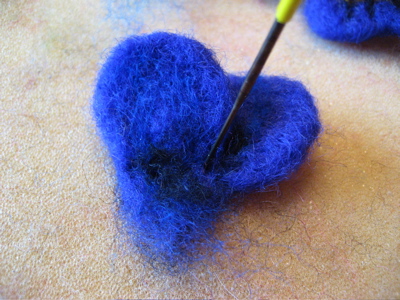
The front petal has an indent in the center of the lobe. Use a 36 or 38 triangle to encourage the area to indent. You can needle straight into the edge of the petal to help the piece indent. Make sure to add this before you felt the piece too much or it will be harder to make it take the shape.
Your pieces should look similar to this:
Step 7:
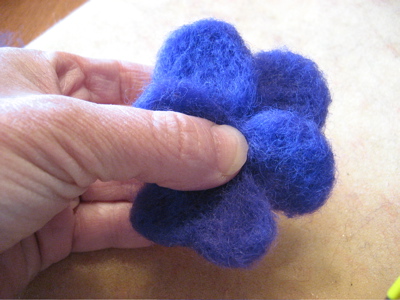
Before adding the color details, hold the pieces together to see if the sizes and shapes work together well. If you are not happy with a piece, now is the time to correct it. Remember the pieces will shrink more as the colors are added and the piece is felted more.
Step 8:
Add gold detail to the two side petals and the front petal. Only a small amount of gold is needed. As you felt it in, remember to not overfelt, since more detail will be added.
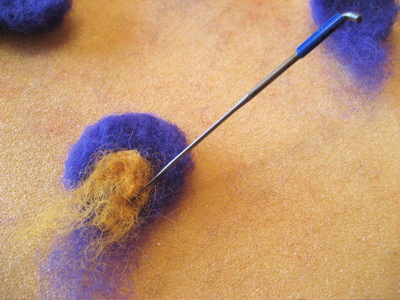
Step 9:
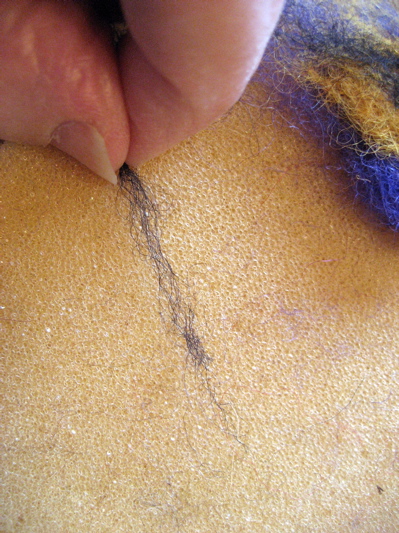
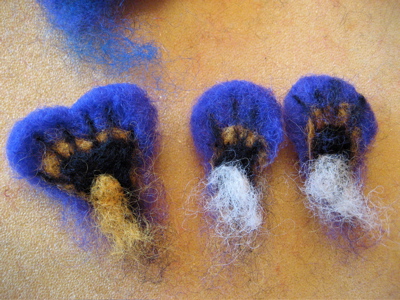
Add black line detail on side and front petals. Work one line at a time. Pull a very small amount of black fiber into a line shape. Lay down on petal so the lines will look like they are radiating from the center. Use the finest needle you have (tri 40) to carefully felt the line into place.
It is often helpful on a line to hold the needle almost parallel to the fibers being added. A gentle back and forth movement in this position will usually felt the fibers onto the petal. The 38 star is a good needle for this. If your line looks too heavy, you may want to remove some of the fibers instead of trying to felt them all in. They will felt down more as the petal receives a final overall felting.
As you add them, they will look like this: (Notice in the photo the piece still does not have a tightly felted look.) 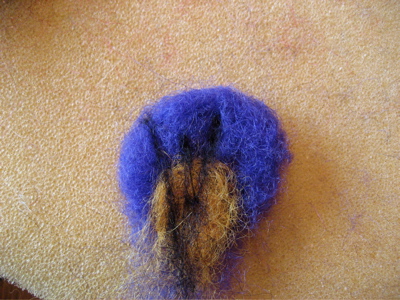
Step 10:
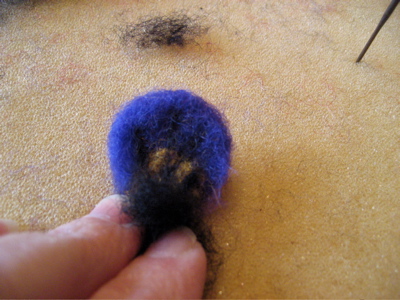
Add solid black detail to side and front petals.
Notice as you add color detail on the front, it will begin to show through on the back:
Step 12:
Add small white throat detail to the two side petals. The front petal has gold throat detail added.
Once all of the detail has been added, needle felt all of the petals except the bottom connection points. Continue until each petal has an even tight felt. Try to felt in loose fibers and work for nice crisp edges. The 38 star is a good finishing needle.
Step 13:
Begin to connect the petals. Slightly overlap one back petal with the other and felt the bases together. Begin with a 36 triangle needle. When it feels like it is “pulling” too much, switch to the 38.
Step 14:
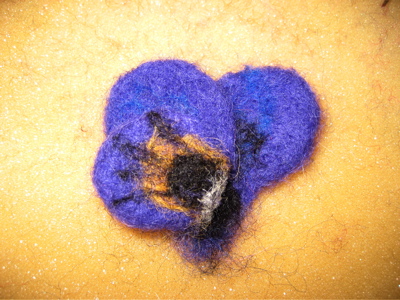
Add side petals. To achieve a more realistic “throat” look, as you apply each side petal bend the bottom of the petal back to make an edge. You can see in the photo the white edge that has been created. Needle felt it to the back petals.
Do the same for the center petal. By bending the edge of the side and front petals, they will form a triangular shaped opening.
If the white detail on the side petals doesn’t give enough definition to the edges of the triangle, you can embellish it further with a small amount of white running down each side of the triangle. This will help to give the throat of the pansy a dimensional look.
The finished pansy:
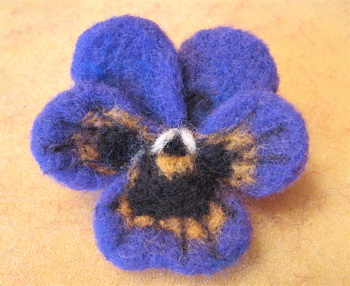
I hope you enjoy making a pansy of your own.


What a fabulous tutorial, Kathy. I know you did a TON of work on this and I thank you so much. It’s beautiful.
You are quite the multi-talented woman! Great tut!
Wow! How wonderful!!! I can’t wait to try felting…I’m so appreciative of those who are willing to share!!! This is just lovely!!! Thanks again, DB in CA
Really cool Kathy!
I have a felted polar bear that I just love. His little face is so expressive. It’s hard to believe he started as a big pile of wool! 🙂
Wow!! I had no idea you did all that. The pansy is gorgeous, but those faces are AMAZING!
Jo
Thank you so much for all this work, Kathy. I love the pansy and I’m going to give it a try — and I agree with Jo, the faces are just incredible!
Andrea
Thank you! I’m just getting started with this and this tutorial is a great find! The finished pansy is just beautiful!
what a wonderful tutorial. It is inspiring you must have worked so hard to produce it . Thakn you.
Hello! I found your tutorial.
I would like to translate it into Russian and post it in my site. I will mention you and your site (let me know which one).
Is it possible? What will be your condition?
Delia
Delia,
I emailed you about your request. I asked Kathy and she’s fine with you translating it and posting it. Please give Kathy credit for it. Thanks for asking and not just doing it. A lot of people don’t think about that and we really appreciate that you did.
Deb
new to needle felting, learned a great deal from this tutorial, more than an expensive book I purchased, one the yarn makes a huge difference.
Had problems with size, small amount is hard to measure.
Also, what do you do with the tails , I had extra that can’t work in! Part of my problem was I added gold and black to close the the ends.
Also my fine black detail where fuzz over the gold, any trick to keeping them looking crisp?
Thanks for the fun, will try another
I can’t wait to try this! Thanks for the helpful tips and photos!